CRM Assets Project.
Options for an un-linked project
The following context menu is displayed when right-clicking on the project node of a web application that has not yet been linked to a CRM organization:

- Allows you to add assets from CRM. See below for the details.
- Allows you to bulk link existing items in your Visual Studio solution to CRM. Helpful if you already have an existing Visual Studio solution containing your CRM assets.
- Allows you to switch to another already linked CRM organization.
Add Items to Project
By pressing the 'Add Items to Project' button, a window appears allowing you to select from any of the following types of CRM assets:
- Web Resources
- System Chart XML Files
- User Chart XML Files
- Sitemaps
- Email Templates
- System View XML Files
- User View XML Files
- JavaScript Intellisense Files
- TypeScript Intellisense Files
- Proxy Classes
- Plugin Configurations
Items to Import Tab
The 'Items to import' tab allows you to select which items you would like to download and link in your Visual Studio project:
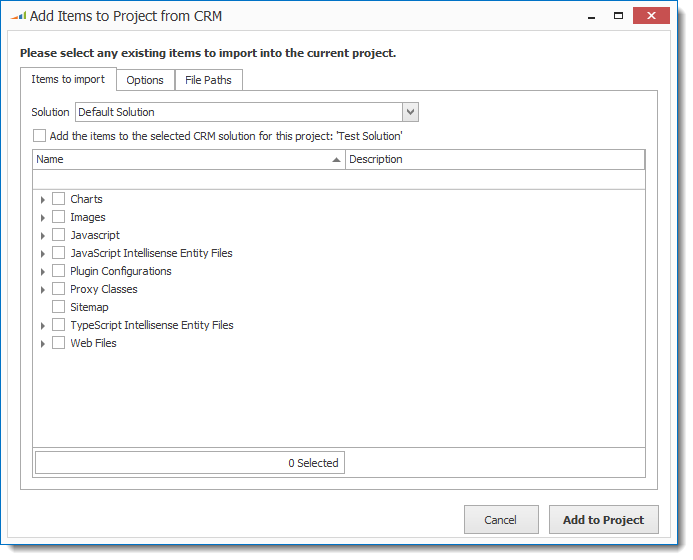
Only the webresources that are part of the selected solution will show in the window. You can select webresources
from any solution by changing the currently selected solution:

By selecting a different solution than the currently selected solution, an additional checkbox appears:
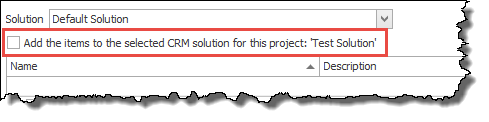
By checking this option, any items that you select in the window will automatically be added to the CRM Solution that has been selected for the linked CRM Organization. To change the
default solution you can see the documentation here.
Once you have selected all the items you would like to import, along with changes any of the settings in the other tabs, press the 'Add to Project' button to initiate the download process.
Once complete, your project and any files downloaded will now be linked to the current CRM Organization.
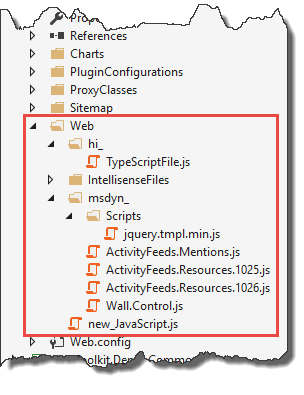
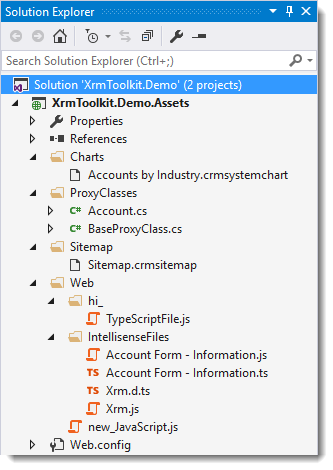
Files will honor the naming convention used in CRM and download the files into their corresponding folder structure:
Options Tab
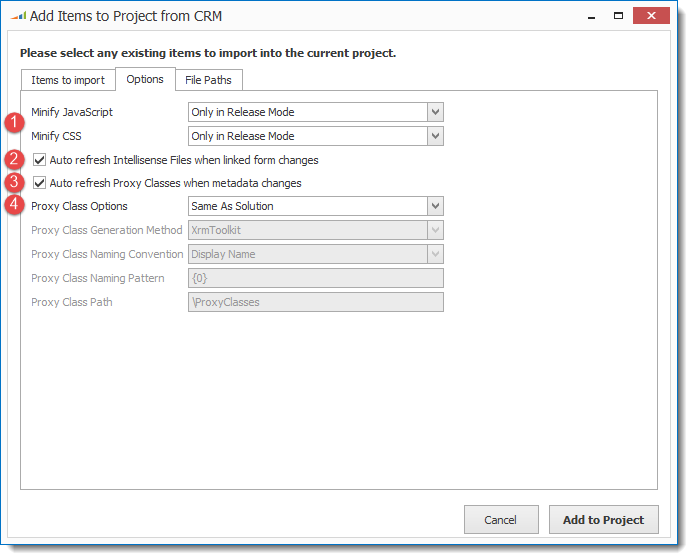
The 'Options' tab allows you to configure different options for each of the files that will be downloaded:
-
JavaScript and CSS minification can occur in the following situations when a file is published to CRM:
- Never
- Always
- Only in Release Mode
The defaults for these come from the global settings here. This setting is applied to each JavaScript or CSS file that is downloaded during this process.
Once the file has been setup, this setting can be changed on a file-by-file basis. For more information see the documentation here.
-
When the metadata is either manually or automatically refreshed, XrmToolkit also checks for changes make to any linked forms for which there are intellisense files,
either JavaScript or TypeScript. If there are changes and this option is checked, the intellisense files will automatically be updated to
reflect any changes to the linked form.
-
XrmToolkit stores both entity and attribute metadata from your linked CRM Organizations. To learn more see our documentation here. You can manually refresh
the metadata or the metadata is automatically refreshed when logging onto the organization depending on option number 3 here. When the metadata is refreshed
you can optionally choose to have any proxy classes that are linked in your solution automatically updated with any changes from the metadata.
-
When generating proxy classes, you can choose to use the display names, or the logical names at both the class and property levels.
You can also optionally specify a specific naming pattern when generating the proxy class names. The default is to just use either the display name or logical name depending on
the setting above. You can specify a prefix or suffix by changing the naming pattern. For example, if you wanted the class name to be [Display Name]Entity then you would specify
{0}Entity as the naming pattern.
File Paths Tab
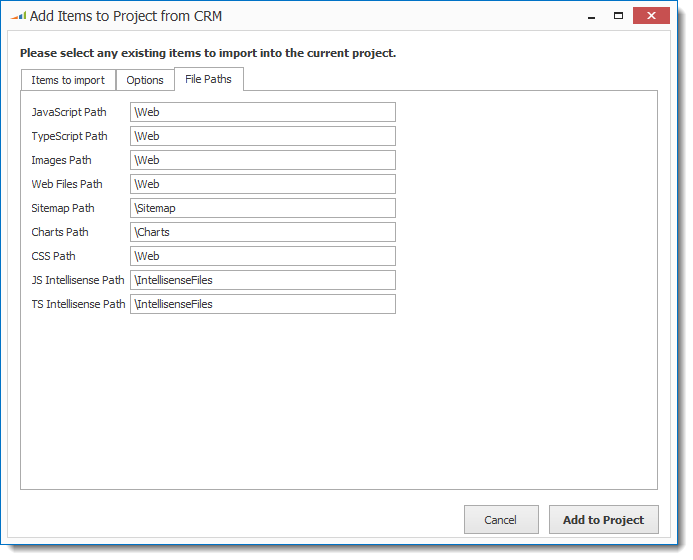
The file paths specified here will be used as the location for saving files within the project structure. These settings get copied from the solution settings here.
The following screenshot demonstrates how items will be
downloaded and saved to a project. As you can see in this instance where Web Resources have been created using a simulated folder structure, they are downloaded and stored
in a real folder structure including the publisher prefix:
When you create a new web resource in one of the sub folders and go to publish it to CRM, XrmToolkit will suggest a simulated folder structure based on the location of the
file in the project:
Options for a linked project
The following context menu is displayed when right-clicking on the project node of a web resource project that has already been linked to a CRM organization:
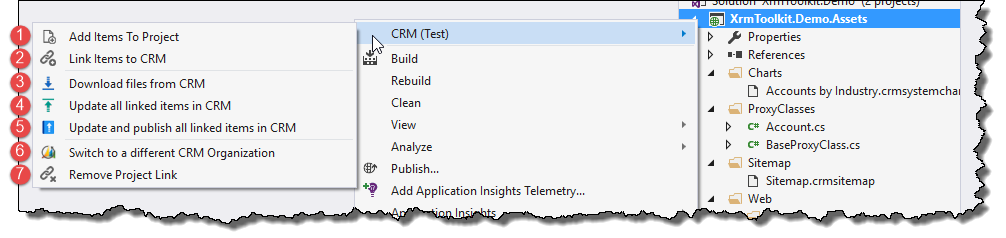
- Add Items To Project - Covered in the this document above.
- Link Items to CRM - Allows you to bulk link existing items in your Visual Studio solution to CRM. Helpful if you already have an existing Visual Studio solution containing your CRM assets.
- Download files from CRM - See the documentation here.
- Update all linked items in CRM - See the documentation here.
- Update and publish all linked items in CRM - See the documentation here.
- Allows you to switch to another CRM organization already linked to the Visual Studio solution.
- Remove Project Link - See the documentation here.
