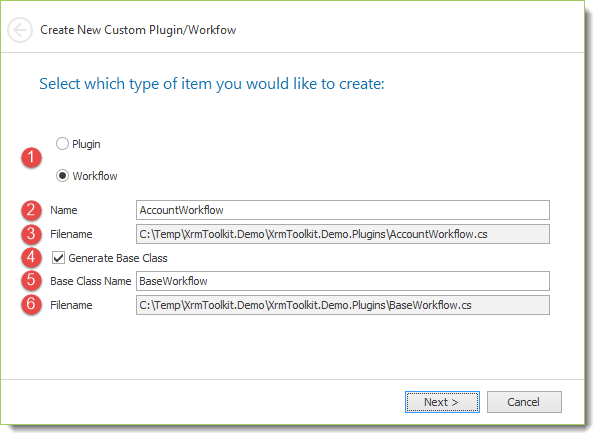
Starting in v4, XrmToolkit provides a new wizard that helps you easily create a custom workflow or plugin.
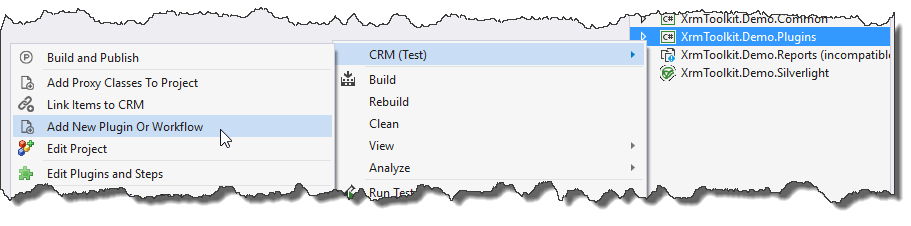
Invoke the plugin wizard by using the 'Add New Plugin or Workflow' menu item for your plugin assembly project shown here:
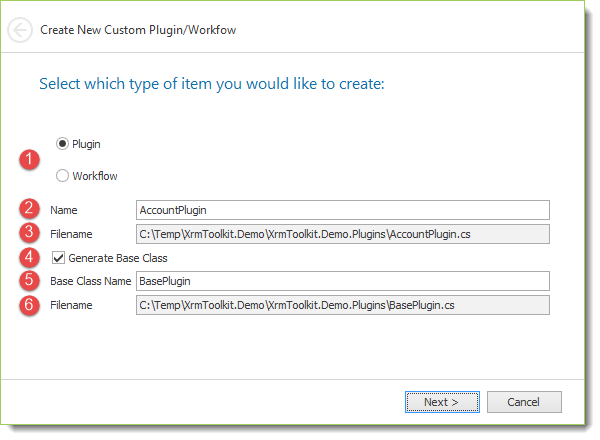
After specifying the name of the file and pressing the 'Next' button, the following will appear:
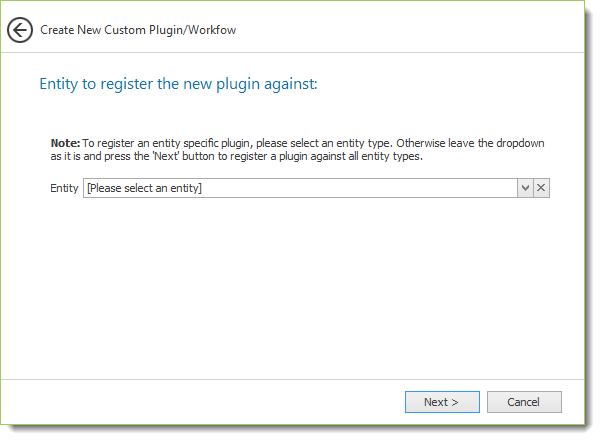
Here you will specify the entity type that you would like to register the plugin for:
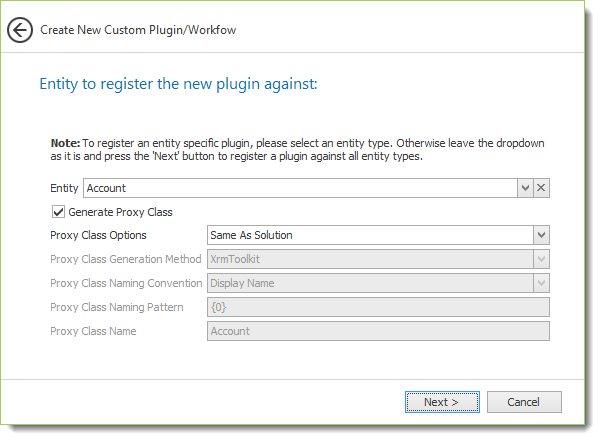
You can optionally create an early bound or proxy class for the entity as well. For more information see the documentation here.

Specify the name of the step along with the other properties according to your needs. For more information see the Microsoft documentation here.
Intorduced in v4, you can also see steps registered for the same entity and message by clicking on the following:

This is helpful in determining the correct 'Order' for the new plugin by comparing the stage and order of the other plugins. Clicking on the buttom shows the following dialog:
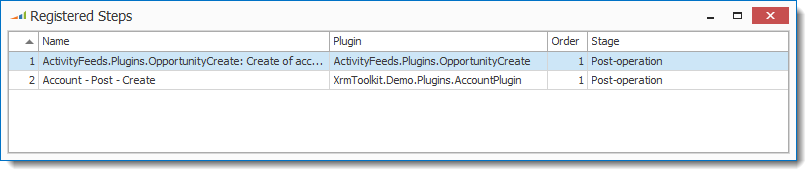
Items are sorted by stage and order such that they should generally be displayed in the order that they will execute.
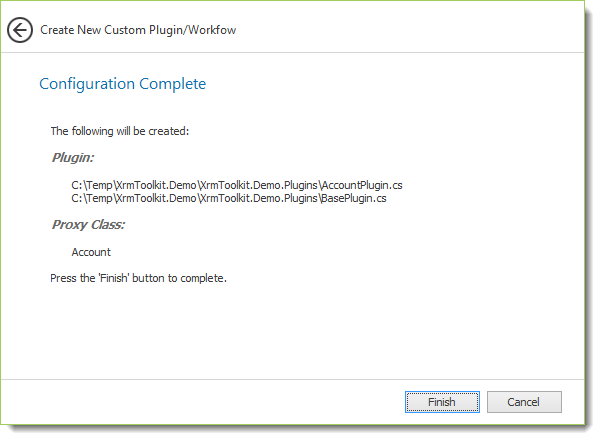
Pressing the 'Next' button will show a summary of what will be created:
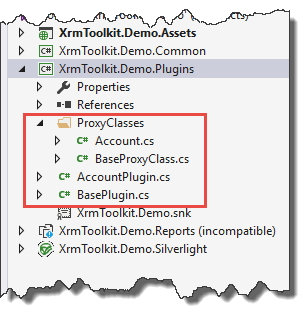
Pressing the 'Finish' button will create the files in your project and open up the newly created plugin file:
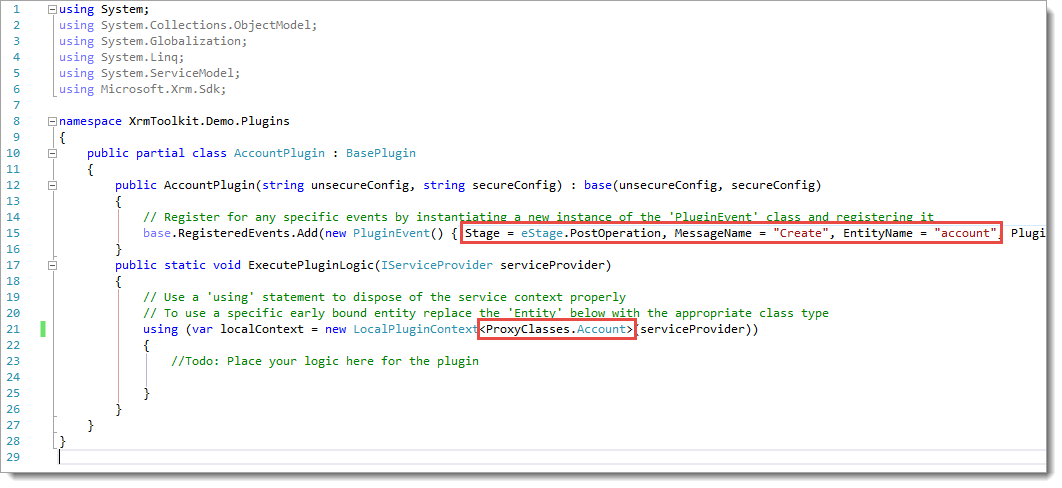
Notice that the stage, message name and entity name properties have been set for you. Also, if you chose to generate a proxy class, you can update the local plugin context to use this class. This is helpful when referencing any 'Pre' or 'Post' images in the local context.
To modify the plugin, step, or image properties you can select the 'Edit Plugin and Step Configs' menu option shown here:
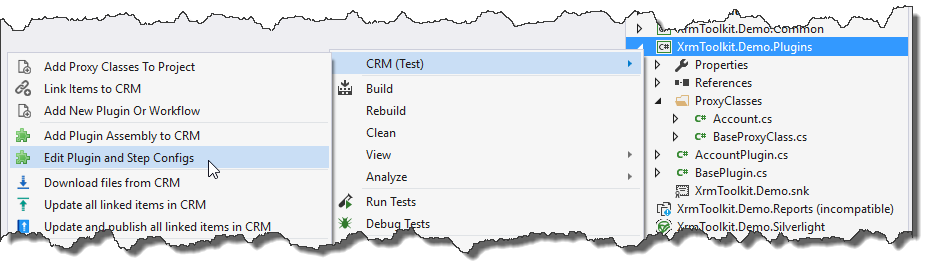
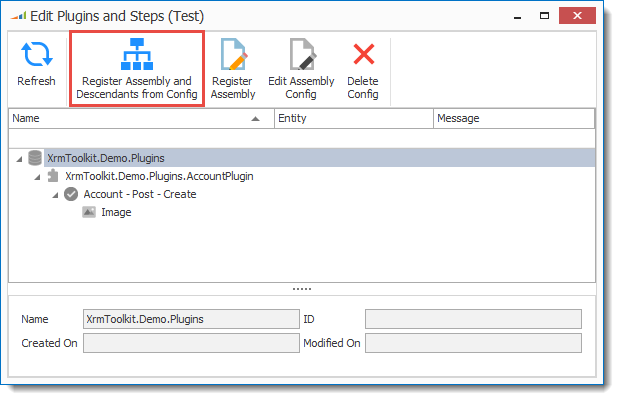
You can register the assembly and all child configurations by pressing the highlighted button:
Invoke the plugin wizard by using the 'Add New Plugin or Workflow' menu item for your plugin assembly project shown here:
Pressing the 'Next' button will show a summary of what will be created:

Pressing the 'Finish' button will create the files in your project and open up the newly created workflow file:


The highlighted portions of the workflow class are for reference only. You can remove/update per your own requirements.
