In order to use XrmToolkit, you must first create a linked Visual Studio solution or link an existing solution to your CRM organization. XrmToolkit can walk you through creating a new Visual Studio solution that when complete, is automatically linked to your CRM organization. To learn more you can read the documentation found here.
If you would like to link an already existing Visual Studio solution to CRM, then you can do so by using the solution level context menu.
The following is displayed when right-clicking on the solution node of a Visual Studio Solution that has not yet been linked to a CRM organization:
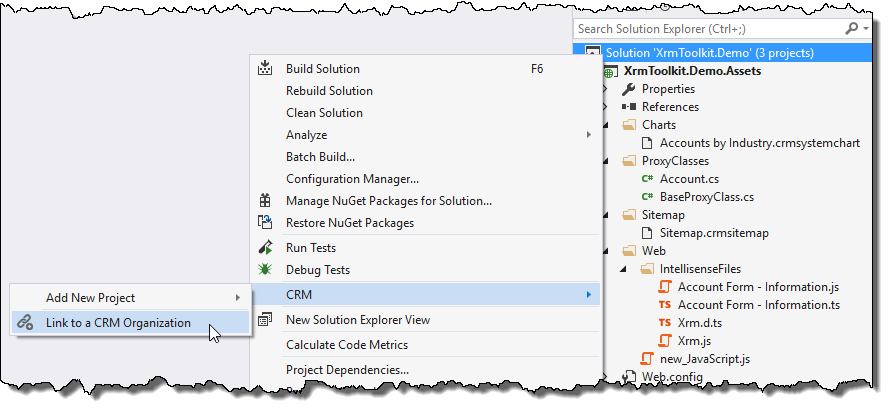
By pressing the 'Link to a CRM Organization' menu item, you will be guided through a wizard that will help you link to your CRM organization.

You will be prompted to enter in the Discovery URL of your Dynamics CRM organization. This can be found by going to Settings area in your CRM. Then select the 'Customizations' Sub-Area and then the 'Developer Resources' link. The Discovery URL is the outlined area in the image below:
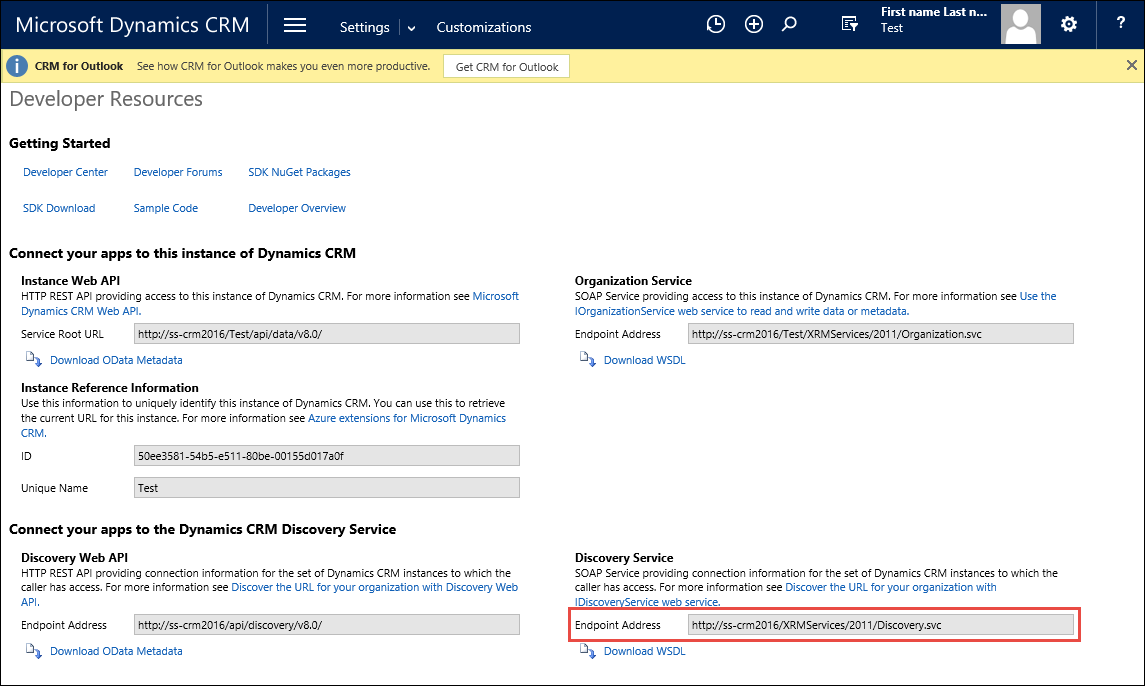
You can also see Microsoft's document regarding your CRM URL's here.
After filling in the appropriate information, you can choose to save your password by selecting the 'Remember Password' option. This will save your password in an encrypted file (see the documentation here regarding the CRMSMU file).
Press the 'Next' button to continue. XrmToolkit will attempt to connect to the Discovery service and authenticate based on the provided credentials. If you receive an error at this point please see our troubleshooting documentation here.
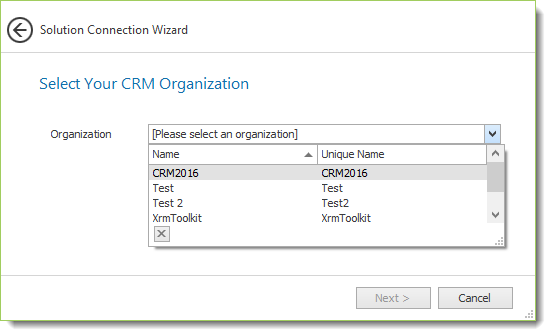
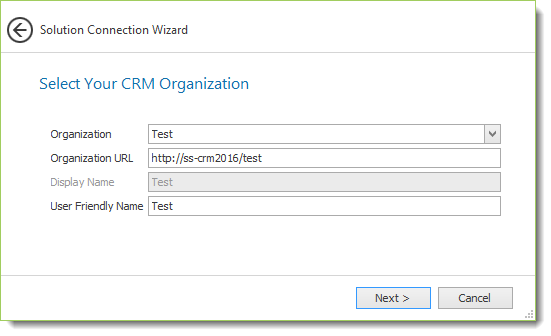
The next area allows you to select an organization. If more than one organization is present you will need to manually select one from the dropdown, otherwise the only organization will automatically be selected for you. After selecting the organization, the 'Organization URL' will automatically populate for you. However, please note that this URL is the one that is stored in the CRM configuration database. This URL is correct most of the time but sometimes you will need to manually override this URL with the correct one. You can also optionally modify the 'User Friendly Name'. This is used to identify the organization in the menu's and other places while using XrmToolkit.
Press the 'Next' button to continue. XrmToolkit will attempt to connect to the Organization service and authenticate based on the previously provided credentials. If you receive an error at this point please see our troubleshooting documentation here.
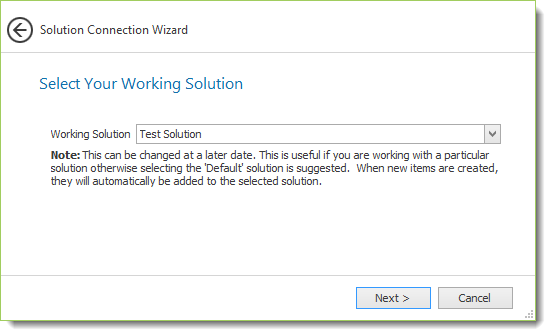
At this point you will be asked to select a CRM Solution. This solution is used as the default solution when downloading existing files from CRM, as well as the solution that XrmToolkit uses when you create new files and upload them to CRM. These new files will automatically be added to the solution selected here. You can modify this selection later by modifying the settings at the organization level. For more information see here.
Press the 'Next' button to continue. You will see a 'Completion' page letting you know that you have completed the connection portion of the wizard.
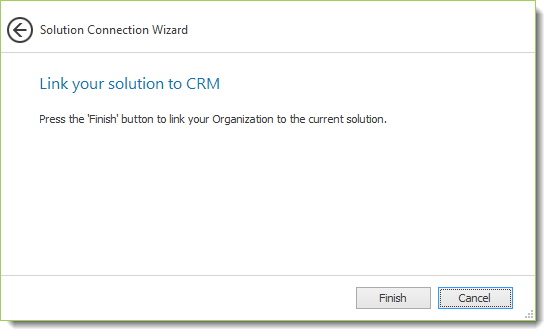
After pressing the 'Finish' button your Visual Studio solution will now be linked to your CRM Organization.
Now when you right-click the solution node in Visual Studios Solution Explorer window the CRM menu will look like this:
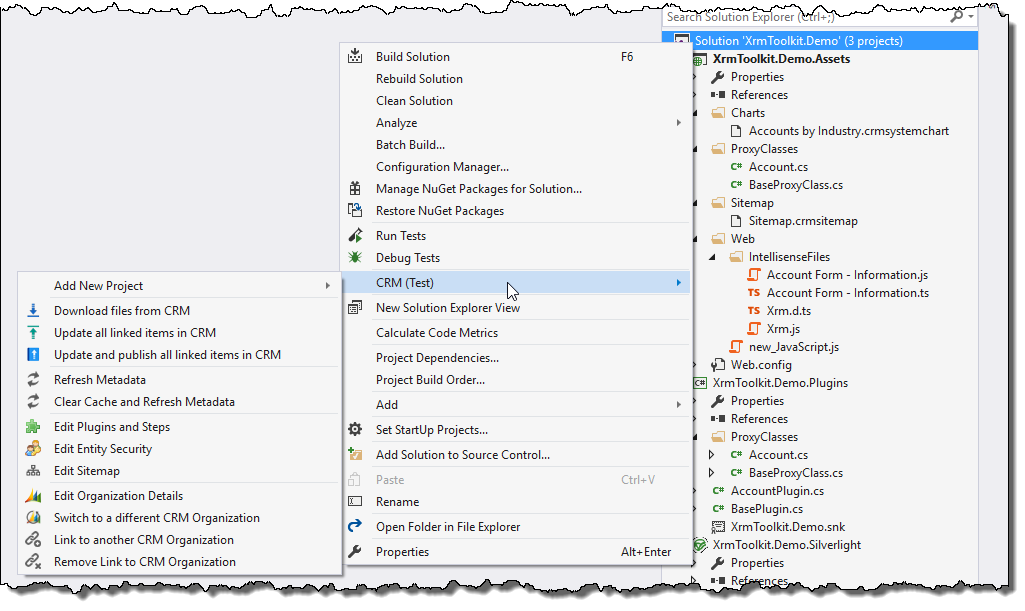
Hovering over this node displays the following sub-menu:
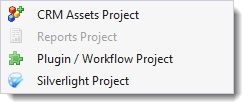
Selecting one of the project types from the sub-menu will invoke a wizard that will walk you through the process of creating a new project of the specified type. For more information regarding each of the different project types see their documentation here:
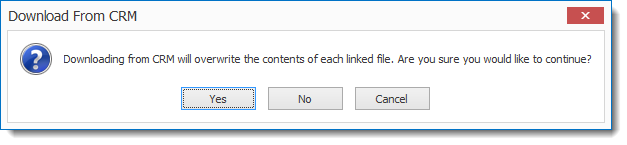
This option allows you to download all items that are linked to CRM. This is helpful if some changes have been made in CRM since the last time your local files were downloaded. A warning message will let you know that by downloading the files, any local changes will be overwritten:
This option allows you to update CRM with any changes that have been made to any of your local files. Please note that this option does not publish any changes to CRM. You must use the 'Update And Publish All linked Items in CRM' method if you would also like to publish your changes at the same time.
Similar to the 'Update All Linked Items in CRM', this option updates any linked items in CRM with your local changes. After updating all the linked items in CRM, the 'Publish All Customizations' method is called in CRM. Please note that this will publish any and all customization changes in CRM, not just the ones that were uploaded by XrmToolkit.
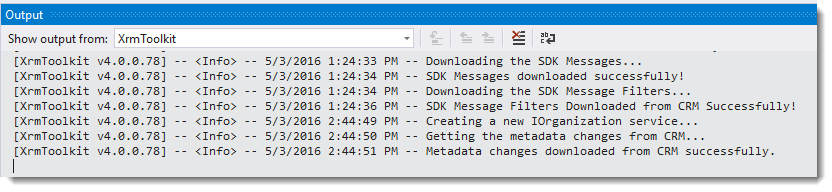
XrmToolkit stores the entity metadata for each of the organizations that are linked to your Visual Studio Solution. Pressing this button will update the local cache with any changes that have occurred to the metadata since the last time the metadata was refreshed. Where possible, this method will only gather the metadata that has changed by using the updated methods in the SDK found here. This runs asynchronously and you can see the results in the output window in Visual Studio:
For more information regarding the local metadata cache, please see the documentation here.
Pressing this button performs the same operation as the 'Refresh Metadata' operation with the exception that it completely deletes the local metadata cache and then downloads all the metadata from CRM. If you are experiencing any issues where proxy classes are not picking up changes made in CRM, this would be the best method to ensure that you have all the latest metadata changes.
Pressing this button invokes the built in plugin registration tool allowing you to edit any and all plugins registered in the CRM organization.
For more information on how to use the plugin registration tool please see the documentation found here.
This menu option opens the entity permissions window allowing you to easily modify the permissions for all roles in an organization on an entity-by-entity basis. For more information see the documentation found here.
This menu option opens the built in Sitemap editor allowing you to easily edit the sitemap without first storing it locally. For more information on how to use the sitemap editor please see the documentation found here.
This option allows you to edit the settings for the current organization. For more information see the Organization Settings page.
You can switch to another linked organization by pressing this button. Doing so will invoke the 'Login' dialog where you can select another organization from the drop-down.
This option allows you to link more than one CRM organization to your Visual Studio solution. To learn more see the documentation found here.
