To publish web resources or other files, these files must already be linked to CRM. To learn how to download files from CRM and link them in your project please see the documentation found here. To learn how to link an existing local file to CRM please see the documentation found here.
Select the item or items that you would like to publish to CRM in the solution explorer window in Visual Studio. Then right-click on any of the selected items to show the item level context menu.

After pressing the 'Publish items' button, a window will appear letting you know that the files are being published to CRM.

If an error occurs while publishing then a message will appear with the error details. Otherwise the window will close and you will know that the file was published successfully.
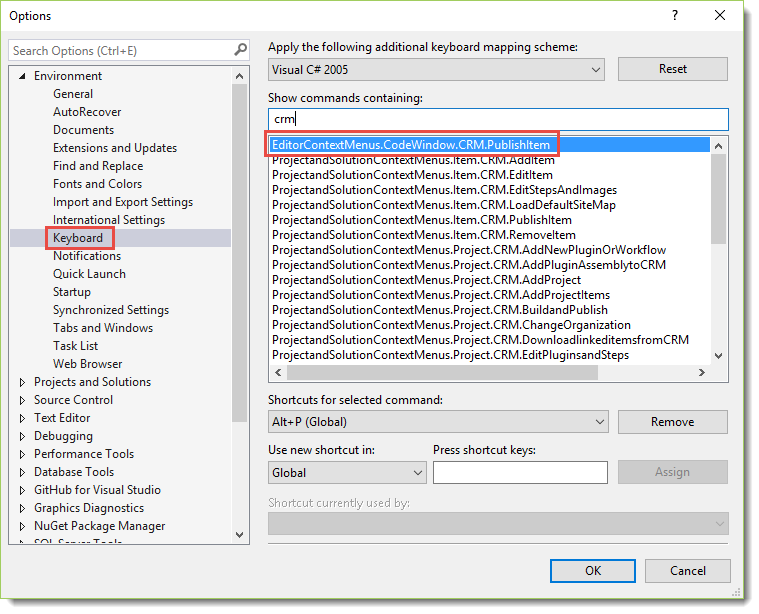
Starting in v4 you can also setup a keyboard shortcut in Visual Studio to pubish the currently active window. To do so open up the 'Options' window in Visual Studio and navigate to 'Environment'->'Keyboard'. Find the command titled 'EditorContextMenus.CodeWindow.CRM.PublishItem' and set the keyboard shortcut. The following image demonstrates this for the 'Alt+P' command:

Please see the documentation found here.
Please see the documentation found here.