Link to an Existing Web Resource.

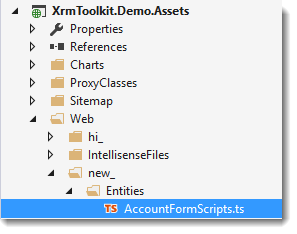
For purposes of this document we will be using a JavaScript file that is found in the following folder in our project:

Note:
The file being used is actually a TypeScript file. This will translate to a JavaScript web resource when we publish to CRM.

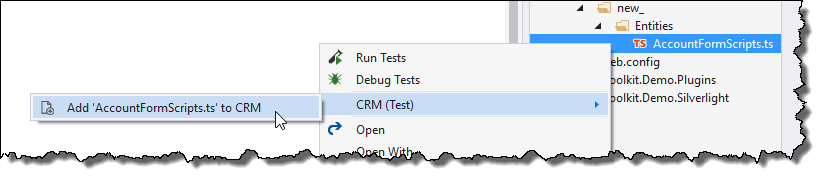
Right-clicking on our JavaScript file in the Visual Studio Solution Explorer window shows the following menu:

Pressing the 'Add JavaScript file to CRM' button invokes the following window:

Note:
If your solution is not yet linked to a CRM Organization then you will be prompted to go through the wizard that will link the two together.
  1. We can choose to create a new web resource or link to an existing web resource.
  2. If 'Existing File' is chosen, we can select which solution to look for a file to link our local file to in CRM.

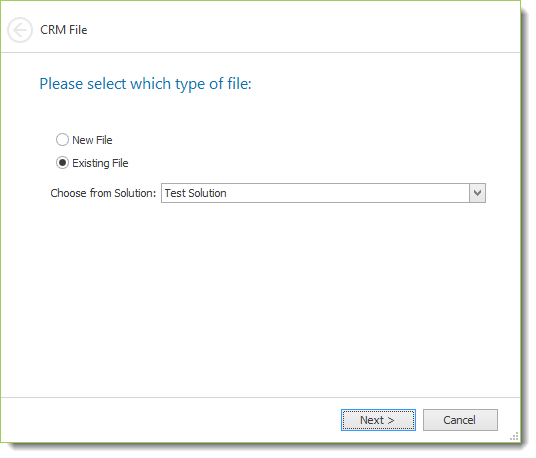
Pressing the 'Next' button shows a page with all the web resources of the same type from the selected solution:

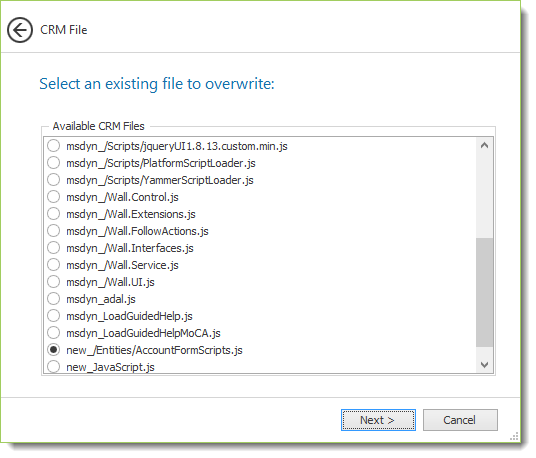
XrmToolkit will attempt to find the correct Web Resource for you. In our case it found and selected the web resource with a name of 'new_/Entities/AccountFormScripts.js'. Pressing the 'Next' button shows a page allowing you to change the different CRM properties of the web resource:

  1. Name - Name of the file in CRM. Changing the name of an existing web resource is not possible.
  2. Display Name - This is the Display Name of the web resource in CRM.
  3. Customizable - Sets the 'Is Customizable' managed property in CRM for the web resource.
  4. Minify on Publish - Controls when a JavaScript or CSS file is minified when publishing to CRM. For more information see the documentation found here.
  5. Description - Description of the web resource in CRM.

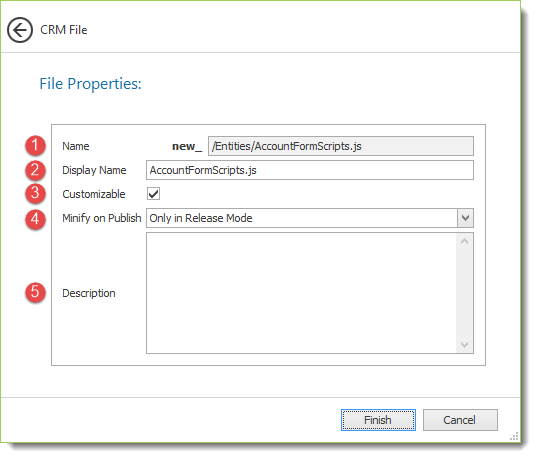
Pressing the 'Finish' button will link our local file with the web resource in CRM. It will also publish our local file to CRM overwriting the web resource in CRM.

To learn more about the different actions available to a file linked to CRM see the documentation here.